|
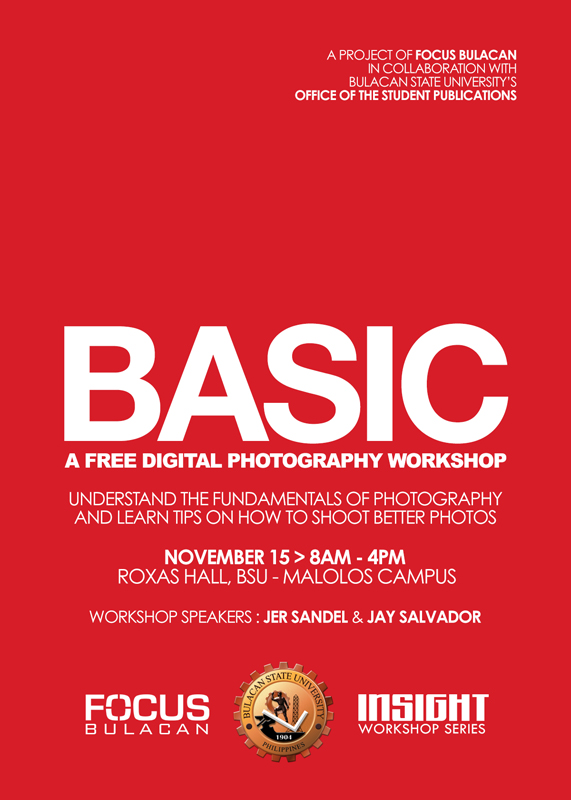
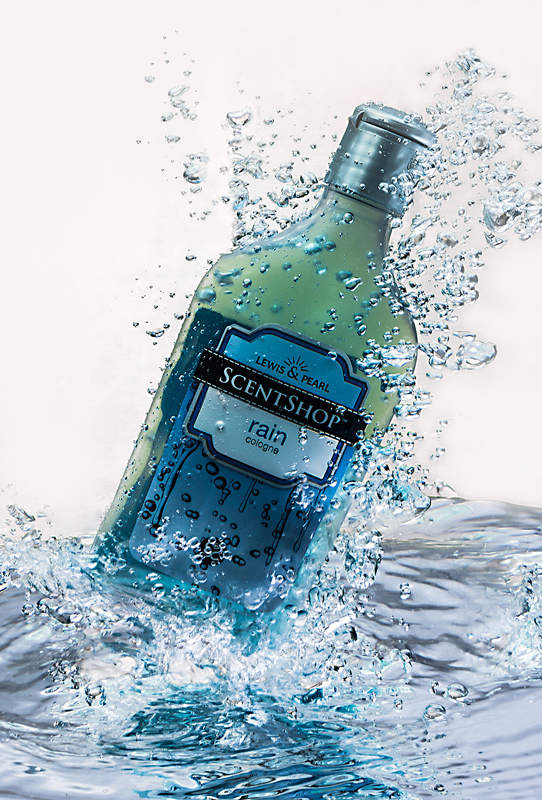
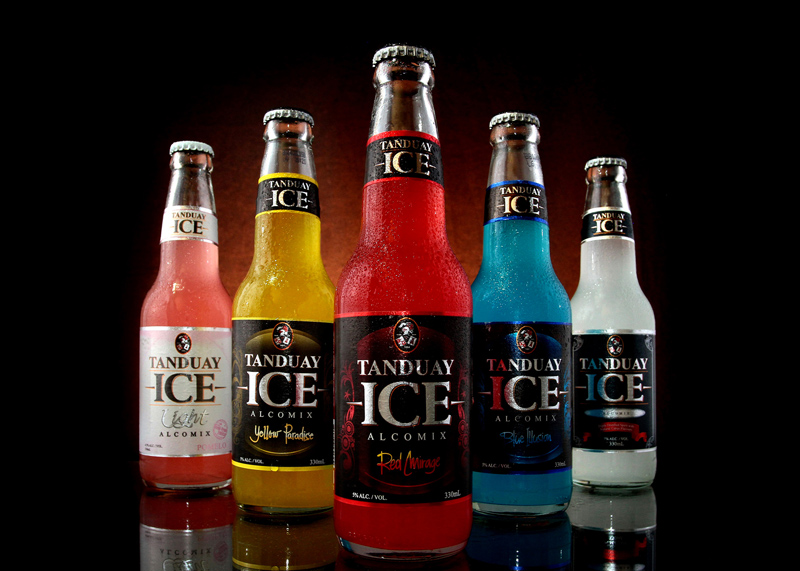
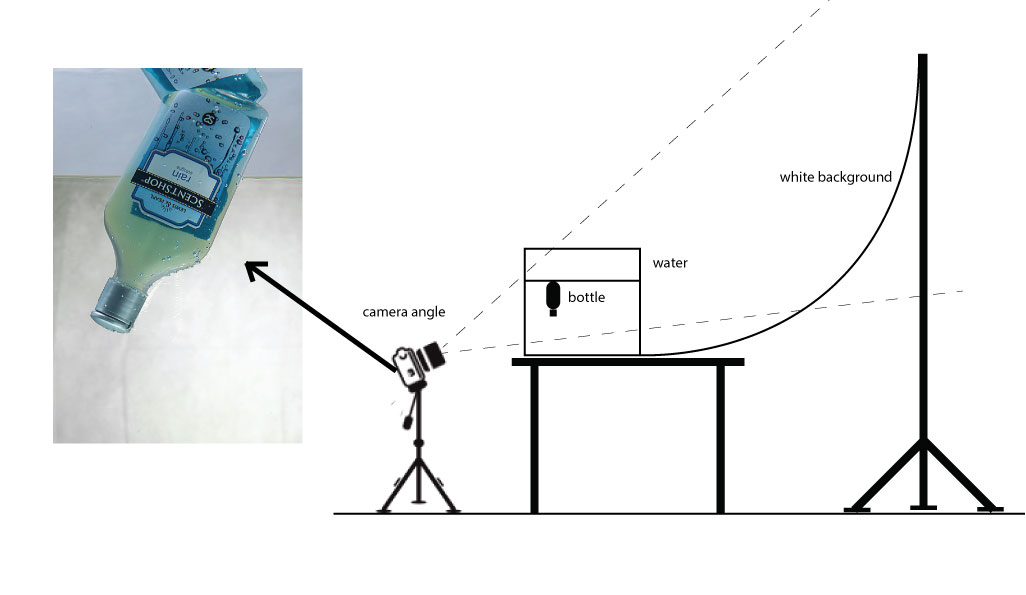
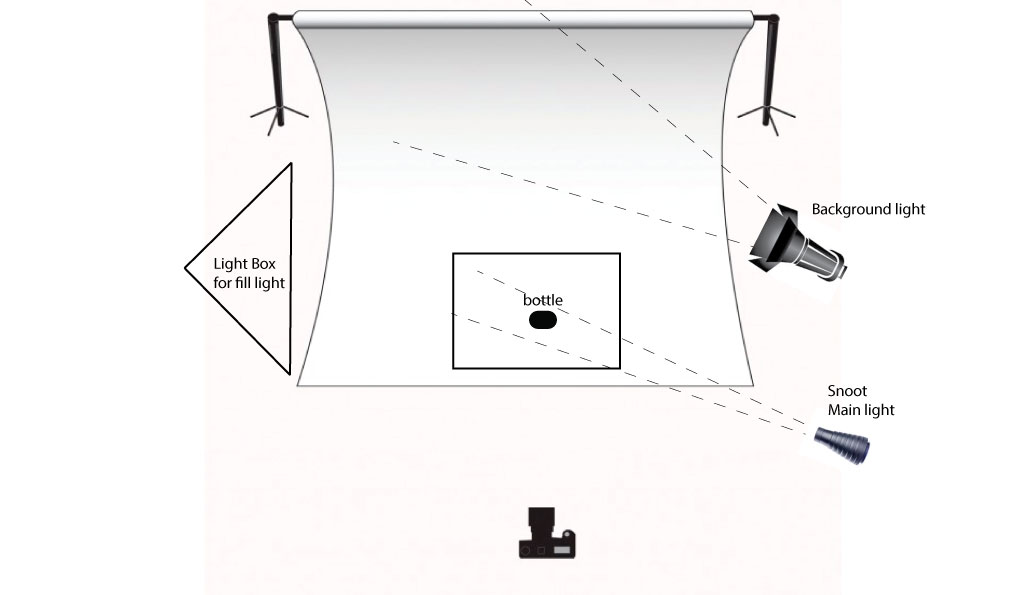
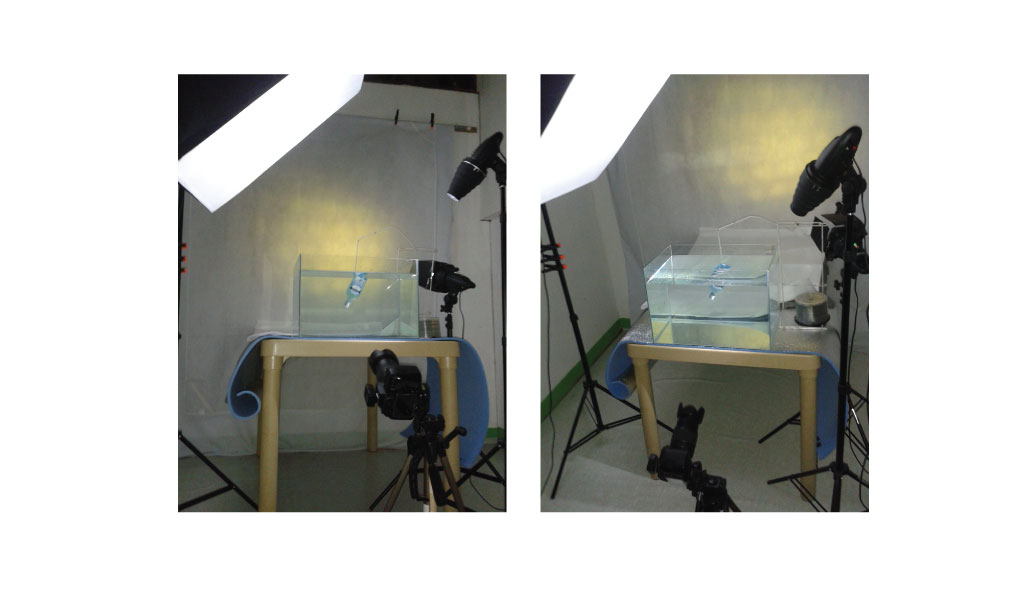
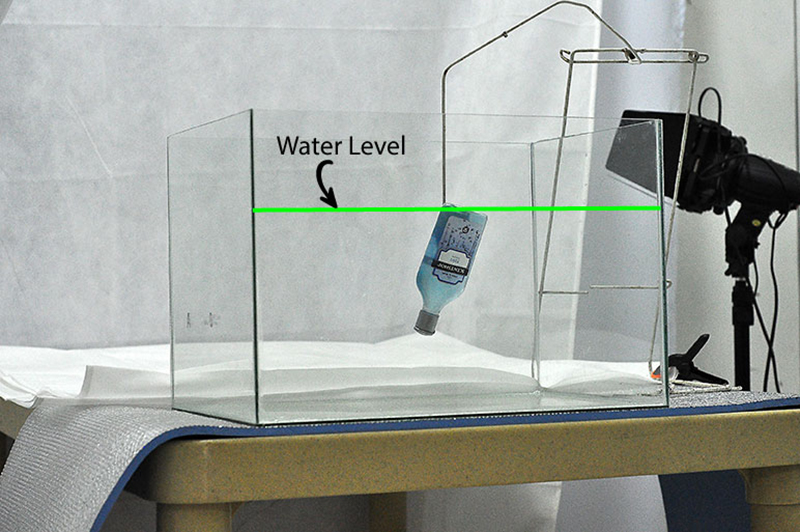
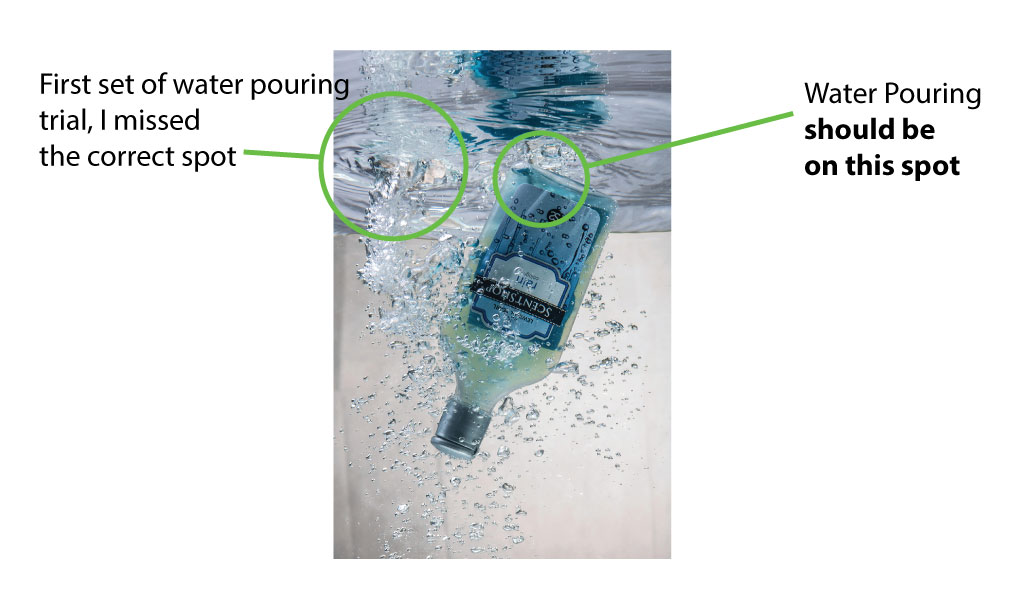
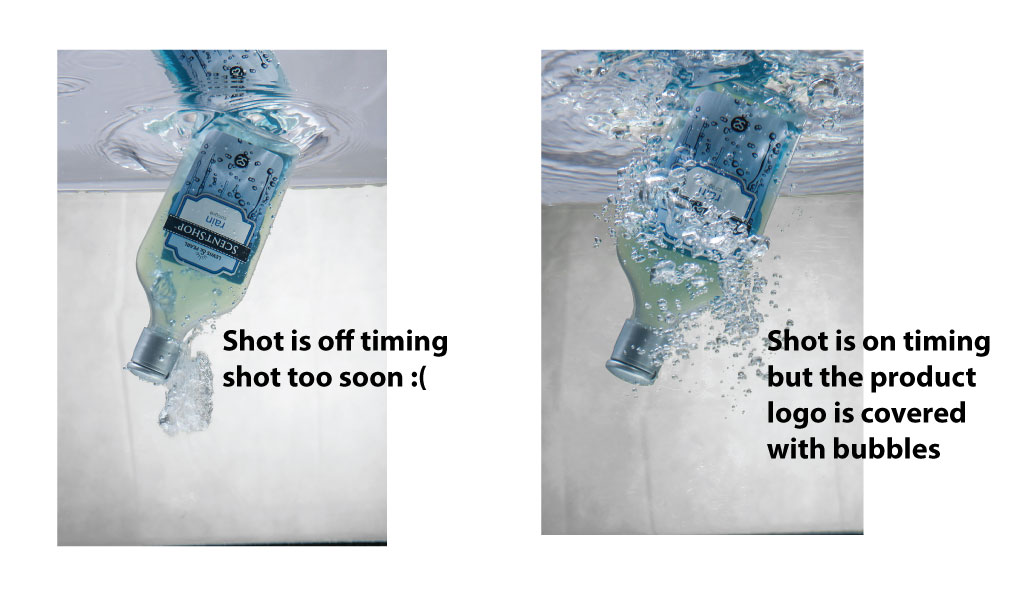
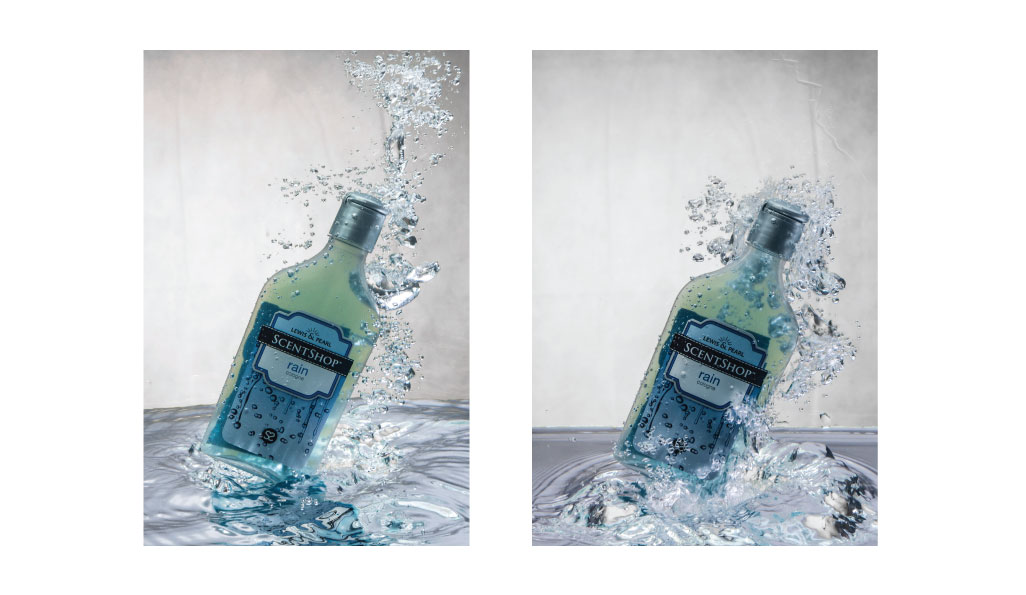
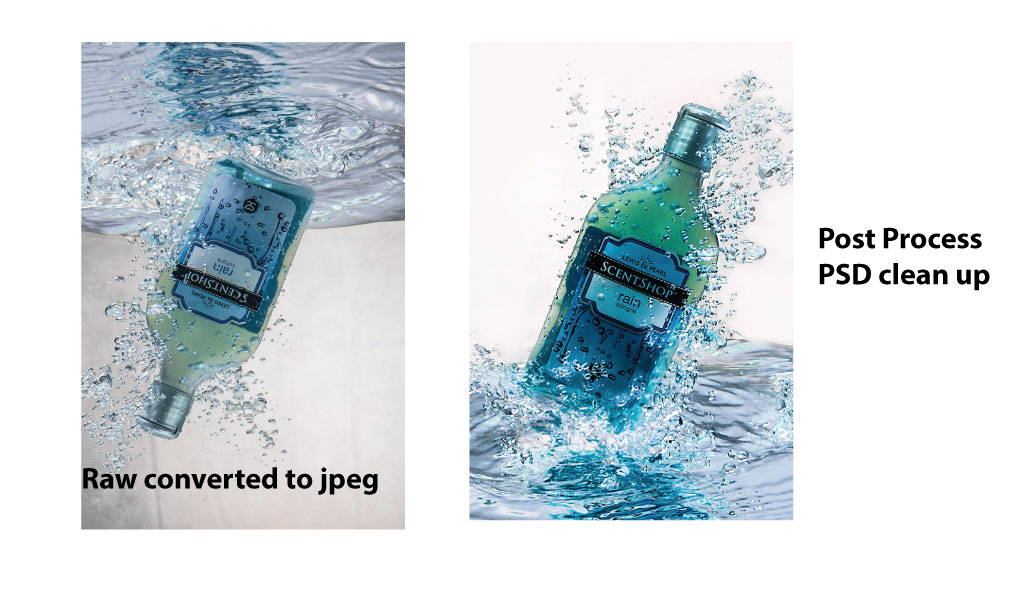
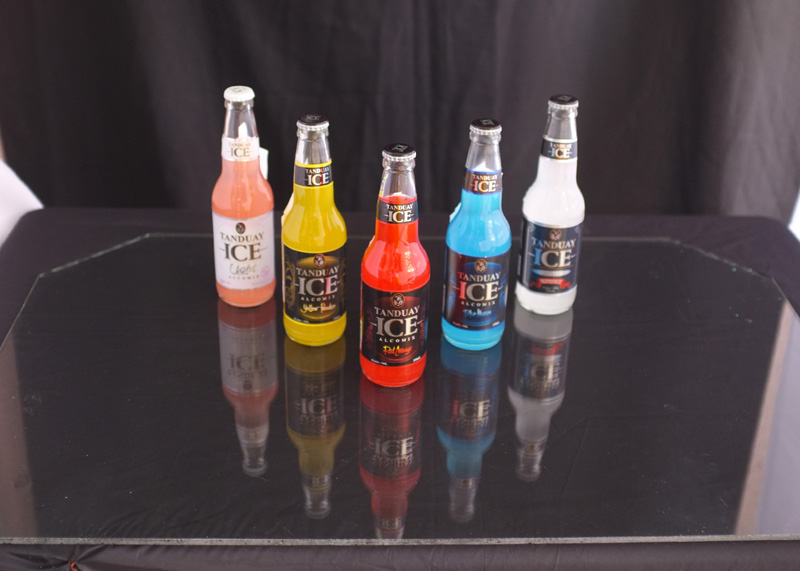
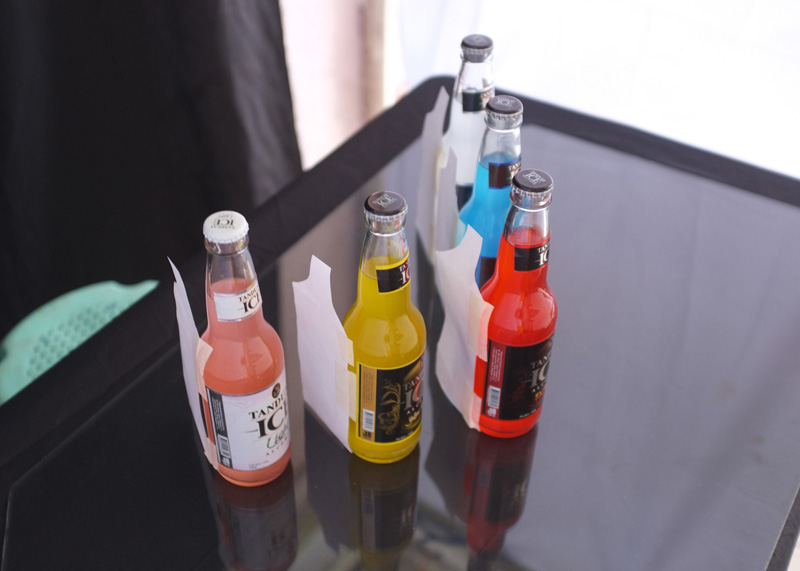
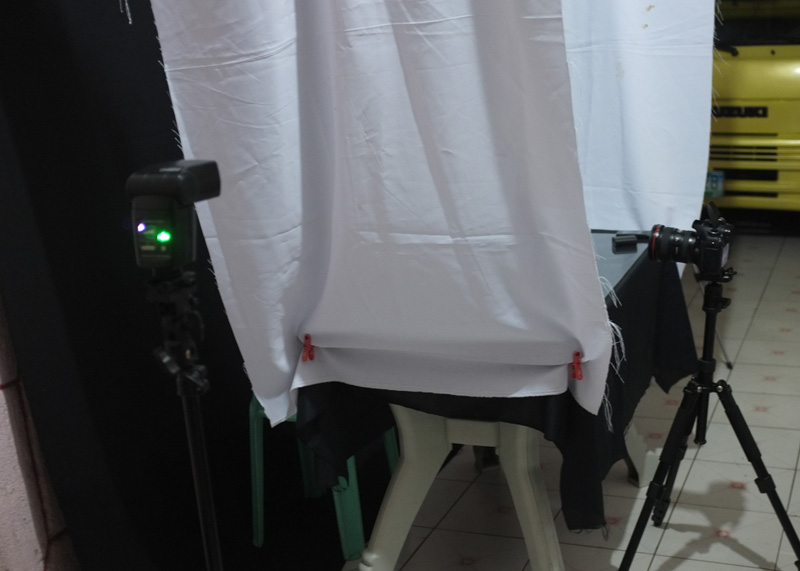
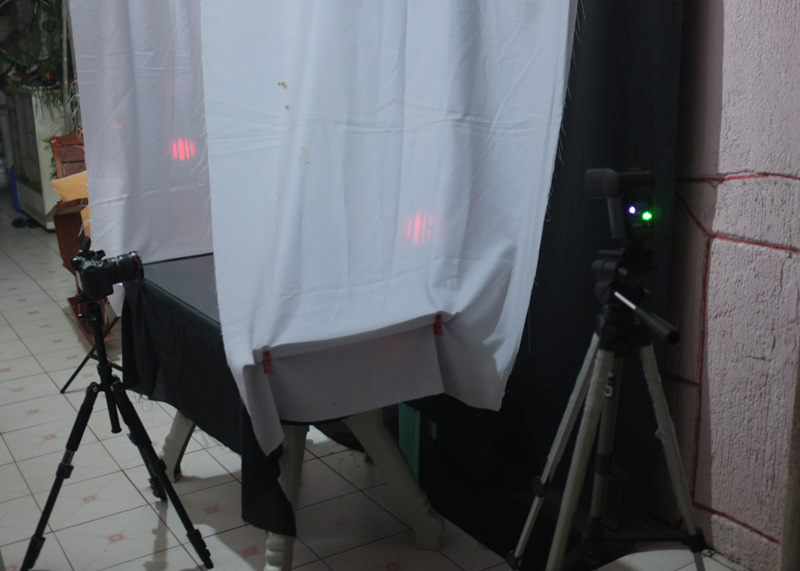
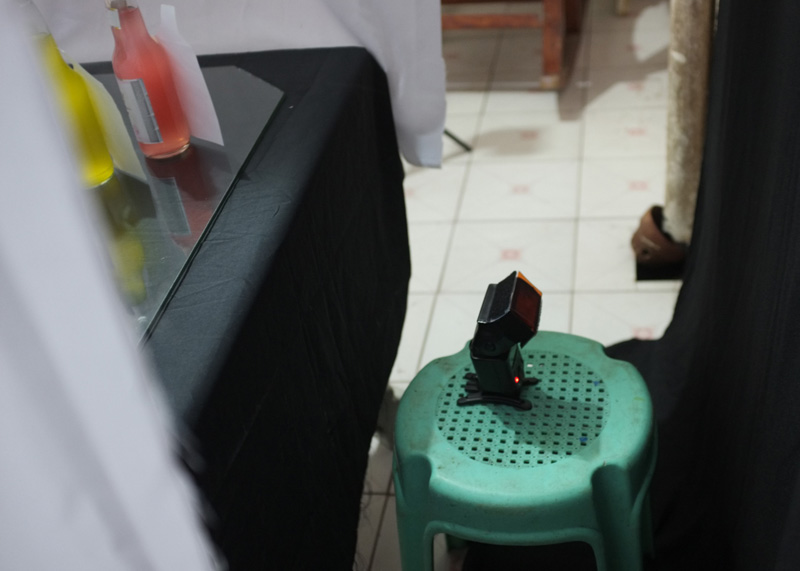
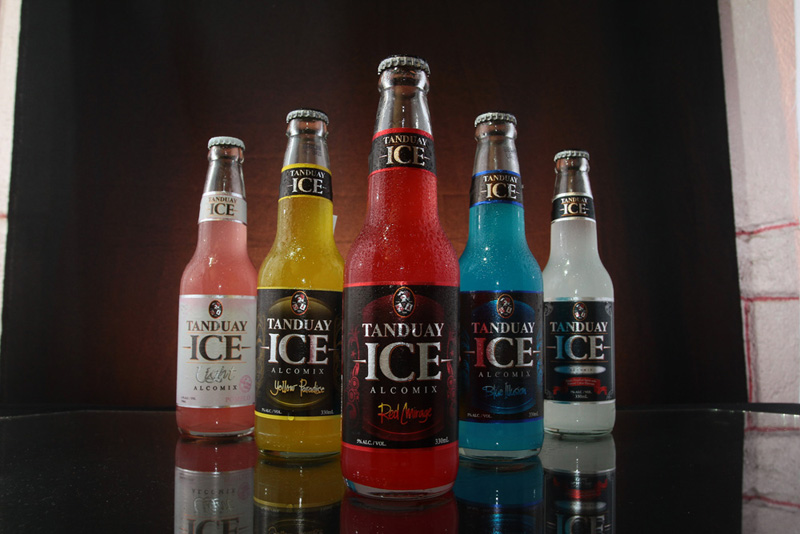
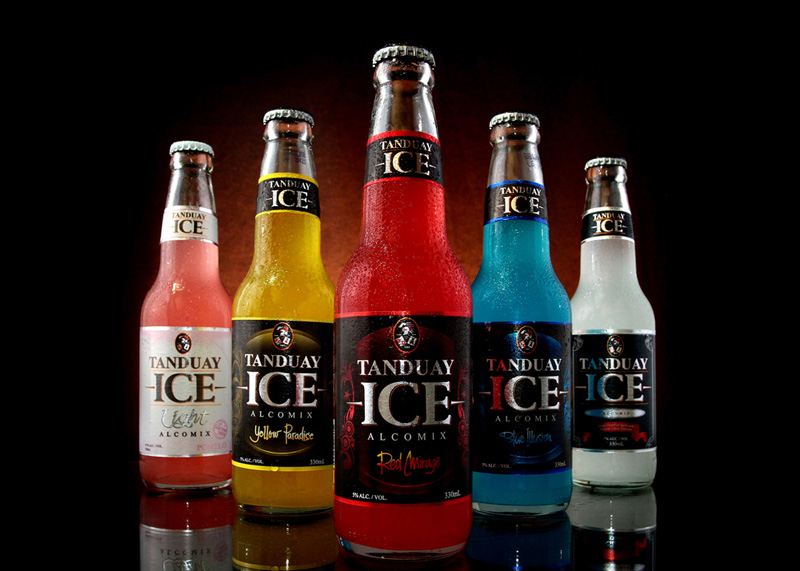
We're formally launching the Insight Workshop Series with BASIC, a free digital photography workshop slated to take place on November 15, 2014. Venue will be Roxas Hall in Bulacan State University's Malolos Campus (we will privately notify attendees of the specific room number). Focus Bulacan is proud to be collaborating with BSU's Office of the Student Publications in making this initial workshop happen. How long is the workshop? It will be a one-day workshop that starts at 8AM and ends around 4PM. Focus Bulacan members Jer Sandel and Jay Salvador will be the speakers. Mr. Sandel will be discussing the basics of digital photography while Mr. Salvador will dispense tips on how to shoot better photos. What will be discussed? Topics include (but not limited to) the following : brief history of photography and understanding the camera, the essential principles of photography, operating your DSLR and digital cameras, guidelines for photo composition, basic post-processing, and practical tips for better photography. Who can attend the workshop? The workshop is open to both DSLR and digital camera users. Since this is our pilot workshop in the series, we are limiting the attendance and will offer only 30 slots for interested parties. 15 slots for (current) BSU students and 15 slots for non-BSU students. Is it really free? The workshop is absolutely free. You will pay nothing. However, we will not be providing lunch to participants. Workshop attendees may go out of the BSU campus (or eat inside campus premises) during the one-hour lunch break. How to sign up? If you're interested to attend the workshop, PLEASE READ and follow these instructions : 1.) Make sure you are available and will be able to attend on the said workshop date and time. Be responsible in signing up. We are offering limited slots, so we don't want to waste slots by giving them to people who suddenly might not show up on the day of the workshop. (We will blacklist those who are no-shows for our next workshops.) Also, we prefer to give slots to people who will attend the whole duration of the workshop. So if you're planning to attend only the morning (or only the afternoon) portion of the workshop, we advise you not to go ahead in signing up. 2.) If you are sure to attend, please send a PRIVATE MESSAGE (not a comment) to Focus Bulacan's Facebook page stating you are interested to attend the workshop, then include the following personal information : - Full Name (real name) - Date of Birth - Mobile Number - Email Address - Address (Baranggay and municipality will do) - Occupation - DSLR or Digital Camera used (Brand / model) - Years since you started shooting or since you bought your camera 3.) Wait for our inbox reply, then wait for a confirmation text message. Reply to our text message to confirm your slot. We will give 24 hours for you to reply thru text. 4.) Once we receive your text message reply, we will then confirm your slot. We will also publish a list of confirmed attendees about 3 days before the workshop. * Please note that we will only be offering 30 slots. We will be using the time stamps of your Facebook private message to determine the order of priority. If you've run out of slots, we will put your name on a waiting list, and will contact you if in case someone from the list of first 30 slots back out. ** You have to sign up personally. You can't sign up for someone else, and just the same, you can't be signed up by someone else. *** In the unfortunate case that you have to back out, please inform us ASAP so we could offer your slot to those in the waiting list. Please be responsible with your sign-up and slot. That's about it. Follow these simple steps and you're all set. Do it early so you don't run out of slots. We'll see you on November 15! For questions or clarifications, drop a comment in the Facebook box below. A few months ago we had a Product Advertisement theme for our monthly contest. Two entries stood out from the rest, finishing a close 1st and 2nd, almost a so-called "photo-finish". The 1st place winner, a cologne photo, garnered 77 points, to edge out the 2nd placer (photo of an alcoholic drink), which got 72 points. Someone had to win, but the two photos were really good, even to the eyes of our guest judge, professional product and glamour photographer Borj Meneses, who voted for both in his ballot...after asking for the RAW files of the photos to double-check the extent of post-processing (and confirming the result was more due to the set-up and planning of the shots). To quote what he said, "Hats off to both photographers for the effort of coming up with good photos. I can't decide which one is better over the other but I think it's not going to be fair if I choose just one." (You may view the contest at http://www.focusbulacan.com/contest/august-2014-theme-contest-product-ad) So we thought it would be cool to feature how the photos were done.... not in Photoshop, but in actual shooting. We'd like to commend our members ERICK AUSTRIA (first-place winner with his Lewis & Pearl cologne photo) and JAY SALVADOR (runner-up for his Tanduay Ice photo) for sharing their setup and info how they executed their images. Without further ado, here's how they did it... Erick Austria, Lewis & Pearl cologne photo : Basically there were two goals that I wanted to show in my product photo entry : 1.) Does it sell itself without much explanation or text description? 2.) Does it make the product so attractive that consumers will want to buy it? After I set these goals, I started looking for some reference of product photography tutorials. Thanks to my friend and everybody’s friend, Google, I found a tutorial from a German guy of AKEL studio in which he shot the Axe product upside down inside an aquarium and pouring water to have the splash effect. I liked the execution of water splash product photography and I was challenged if I can do the same or at least come up with the same effect. I started looking for a product that I want to shoot that will fit the execution. After a few days of looking at every product in the supermarket, holding the product, turning it upside down, looking at every detail, being followed by store customer service representatives, being asked by my wife if I’m okay... I know I looked like a crazy guy holding the bottle upside down and looking how the lights will affect the shape, shopping for commodity is different than shopping for a product to shoot. To cut the story short I ended up buying Lewis & Pearl Cologne, I liked the product name with the “Rain” label on it. To better explain how I did my contest entry, I made diagrammed photos : Finally, some success... The raw photo, and the processed photo. Cleaned up the background and boosted the contrast. The bubble effect was real and definitely not photoshopped. A lot of trial and error but once I got the shot that I wanted, that was it. Jay Salvador, Tanduay Ice photo : OBJECTIVE Produce a colorful and dynamic shot of Tanduay Ice MATERIALS and EQUIPMENT USED : 5 TANDUAY ICE in different flavor and colors - main subject BOND PAPER - serve as reflector WATER SPRINKLER - used to create a mist effect 24x 36 inch FLAT GLASS – this is where the subject will be placed and creates the subject reflection 2 BLACK CLOTHS - 1 for backdrop & 1 used beneath the flat glass to make a clear reflection of the bottles 2 WHITE CLOTHS – serve as a diffuser 3 STROBE LIGHTS – 2 strobes serve as main light and 1 strobe with color gel (amber) for the backlight SET UP Place the black cloth underneath the flat glass and place the bottles on top of the glass and arrange it in V-formation. Cut the bond paper and stick it to the bottle as shown in figure below. This will serve as reflector and it will help improve the color and glow of each bottle. Place 2 strobe lights in each side with ½ power. The 2 white cloths will serve as diffuser and will give a nice gradient light effect to the bottle. Place the 3rd strobe (with amber color gel) behind the subject and aim it at the backdrop, this light will separate the subject from the background. All the strobes were triggered by the built-in camera flash. The resulting raw photo : And the final, processed output. Cropped and boosted contrast. When we put effort and thought into our photos, mixed in with some experimenting then correct execution, more often than not we would get the result that we want. Erick and Jay created these photos because they were challenged by the contest. Sometimes, what we need is motivation to do the best that we could. And it was enough to create striking product ad photos... and win first and second place in the competition. Our big thanks to Erick and Jay for sharing with us how they did the product ad shots. We hope this feature helped inspire other photographers who also want to do this kind of photography. Remember : planning, setup and execution are key. Photoshop is just secondary. Cheers! |
Inform & Inspire
Tips, advice, and hopefully helpful information from our members intended to speed up the learning curve of photography beginners. Archives
August 2016
Categories |


 RSS Feed
